There are times with Kaseya that you simply don’t want to globally approve a patch, such as a Service Pack release, or today we had a Microsoft patch (KB3046002) that would fail if installed with other patches and is possibly part of a patch issue that shows “Stage 3 of 3…”. For whatever reason, if you need to manually install a patch, Kaseya makes it very easy.
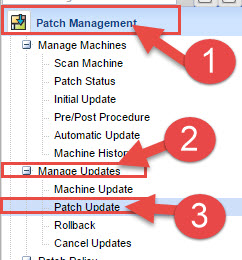
1. Go to Patch Management Module (#1) -> Under Manage Updates (#2) -> Select Patch Update (#3)
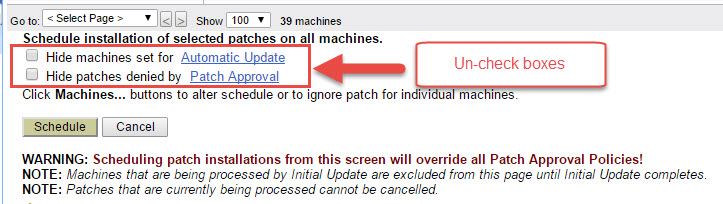
2. When the patch update comes up, UN-check the two boxes at the top of the screen.. “Hide machines set for Automatic Update” and “Hide patches denied by Patch Approval” (NOTE: You can also control this by machine group, so if you are only updating a single customer/type of machine, then switch to that group/view first)
3. Wait for the screen to populate, and then press “CTRL-F” to open up the search window, and type the KB article you are looking for. (NOTE: If the KB article is not found, it generally means that you do not have any machines in the current filter (machine group/view)).
![]()
4. Locate the KB article you are looking for (#4). (NOTE: There are often MULTIPLE entries for a KB Article, referencing different OS types). When you locate the KB article(s), you will see in the middle column (#5), the number of machines that are missing that patch. To schedule installation for those machines, for that KB, click the “Machines” button (#6).

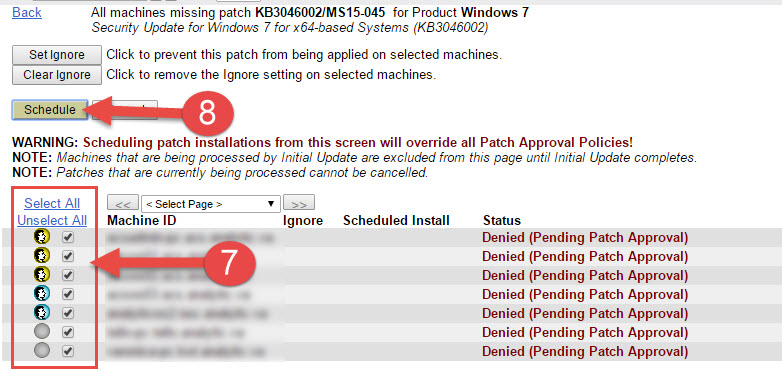
5. The next screen will allow you to select all or any of the machines you wish to schedule installation (#7), make your selection, and click the “Schedule” box (#8).
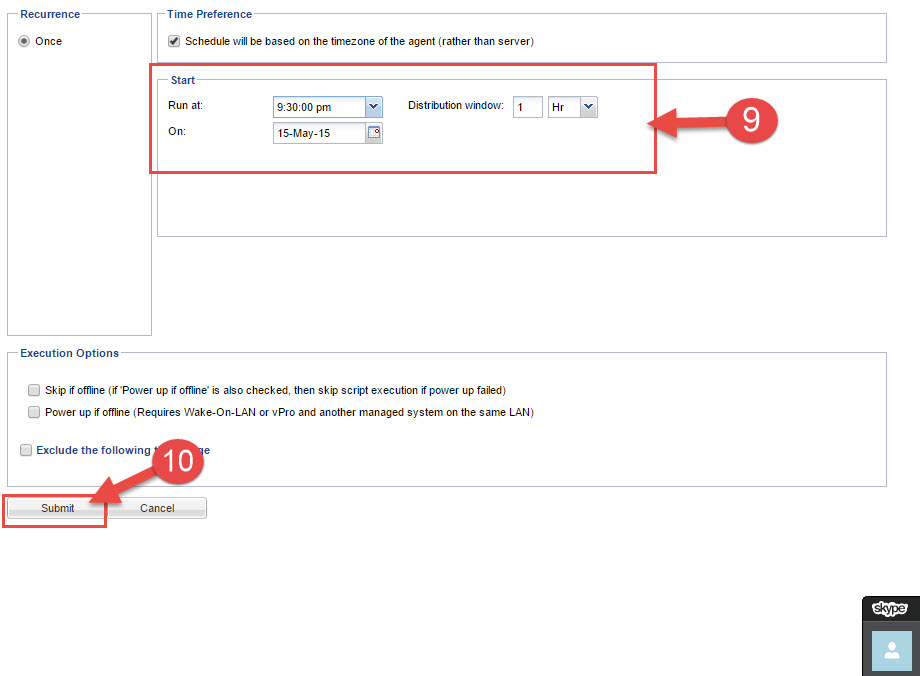
6. Lastly the standard scheduling window will pop up, allowing you to schedule when you would like to install the patch (#9). Pick your time, date, and distribution window, and press the “Submit” button at the bottom (#10).