Ever wanted an easy way to get your clients to send you an email when they need support? Why not use the Kaseya icon? Here are the steps: 1. Go to Agent Tab, Configure Agents, and select Agent Menu. 2. In the center area, find the 4th check-box from the top (#1). Check the box, and in the empty box next to it, put a description of what you want to show on the icon. In this example I put “Email Support” (#2) 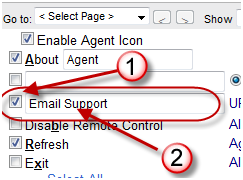
3. Next, in the “URL” box next to where you typed your description, you can type the mailto: information (#3). You have a variety of options here, but note that the entire URL is limited to 100 characters, so you will have to be careful with your wording. In this example I am including the email address, Subject, and a short body text. The entire line reads:
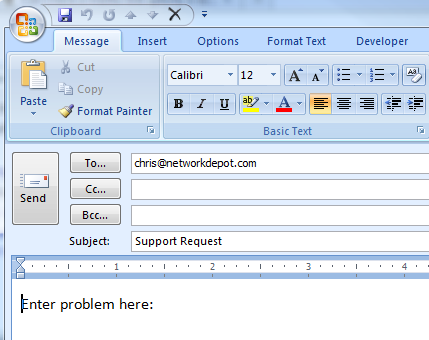
mailto: chris@networkdepot.com?subject=Support%20Request&body=Enter%20problem%20here:

4. When you are done entering the URL information, you can check all the machines that you would like to assign this to (#4), and then click the “Update” button (#5)

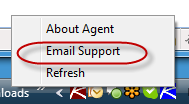
5. Next, wait a few minutes (or click “Refresh” on your test computer), and now when you right-click on the icon, you will have the option to “Email Support”
6. When the user clicks on this, the default email program will open up a new email, and the appropriate fields will be populated.
Done! Now you just need to educate your clients.


