We often get asked “After my trial period is over, how do I get started?”, so I thought I would share with you the steps!
Going live with Virtual Administrator’s IT Center is easy, just follow the steps below.
As you get near the end of your trial, you will get some emails to remind you to sign up. Don’t wait to long, or you will lose access to the portal, and will have to contact us to re-enable your account.
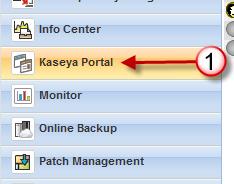
Step 1: From inside of IT Center, select the “Kaseya Portal” from the module bar on the left of the screen (Button #1).
Step 2: From the Kaseya Portal menu, click on “Dashboard” under the “Home” section (#2). You will then see a series of boxes come up on the screen. Some of these boxes will keep spinning for a while, wait until they all finish and select click the green “Buy Now” button (#3) from the top-middle box (“My Account“).
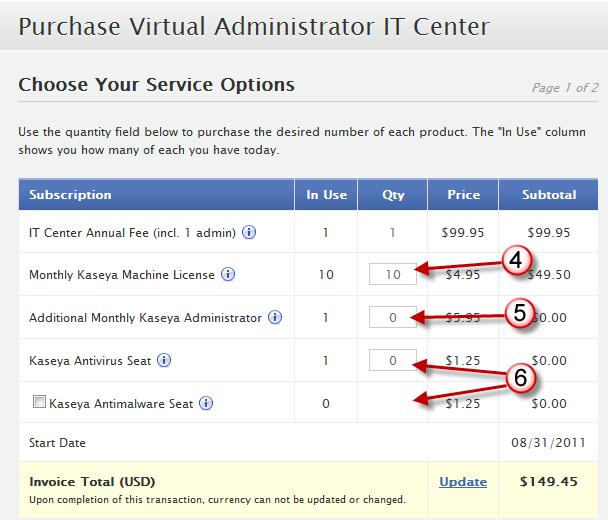
Step 3 – You will now be able to choose your service options. There are a few areas that you need to select.
- Monthly Kaseya Machine License – Enter the number of agents that you wish to purchase (#4). You MUST purchase AT LEAST as many as are deployed, so if you have deployed more then you are ready to purchase, exit out and go back and delete the old agents. Also, be aware of any price breaks… Be sure to check my blog article on “How to Save money and even get some Free agents…” to make sure you get the best value.
- Additional Monthly Administrator – Your first administrator is included in your annual fee, but if you are using more administrators, it will show them here. (#5) Note: You must purchase at least an equal number of administrators as are showing.
- Kaseya AntiVirus (KAV) and AntiMalware (KAM) licenses – If you are using or require any KAV or KAM licenses, please include those quantities here. (#6)
To finish up, just press “Continue“, and then enter your credit card information. Kaseya will keep this info on file and will automatically bill you every month.
Please let us know if you have any questions or problems.


