Ever have a client that needed emergency or occasional remote access to their system? There really wasn’t much you could do, short of setting up an account for them with a commercial remote control vendor like GoToMyPC, TeamViewer, or LogMeIn. Kaseya has always had a feature that allowed you to grant access to a customer, without giving them a full Kaseya login, but we were always hesitant to suggest this, with the old versions of Kaseya remote control, however Kaseya Live Connect works pretty reliably, so it might be something you want to now consider.
Jim B. put together these instructions, but before we show you how to set it up, I want to say this… IMHO, this should only be used for OCCASIONAL access. If you have a client that often needs remote access, they will probably be better served with one of the commercial choices that are designed for end-users. Kaseya’s Live Connect was designed for technicians, so while functional, it might not be as intuitive, and it also lacks things like remote printing, that might be needed by a regular user.
With that caveat, here is how you set it up:.
On the Agent tab go to Portal Access. Select an agent with the radio button. The agent name will automatically populate the Logon Name box. You can type in a more user friendly name or use the agent name then set the password. Click “Apply Name Change”. Note: The system will not allow duplicate logon names. This is a multi-tenant KServer so user names like “Joe” may already be taken. You should something more unique to the user. NOTE: Remember that names in Kaseya are case-sensitive, so be sure to let your customer know!

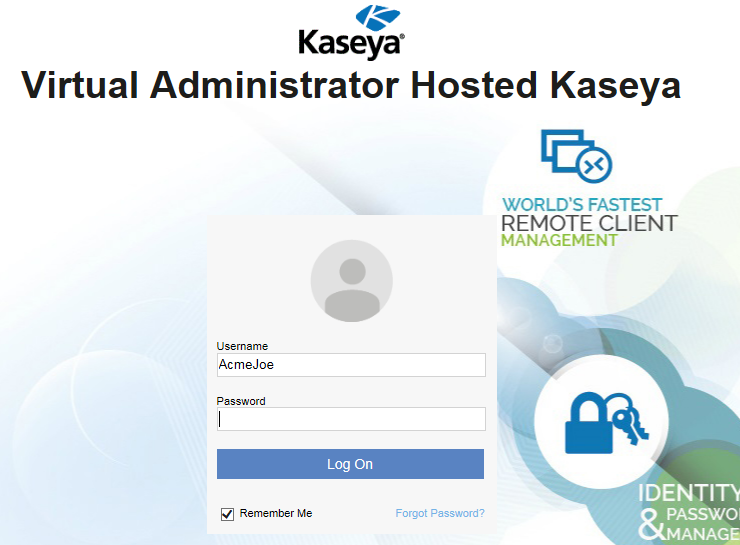
The end user can then go to https://{your server URL here}/access/ to log into the account. They will see the usual Kaseya login page.
When they to log in they will be prompted to install the Plug-ins. As you know, it can sometimes be a challenge to get plug-ins to work correctly with certain browsers. You may want to encourage them to use IE, or make sure that their remote machine has everything installed first, before you let them loose on it!

They will also see this warning:
.![]()
They should Run and both.
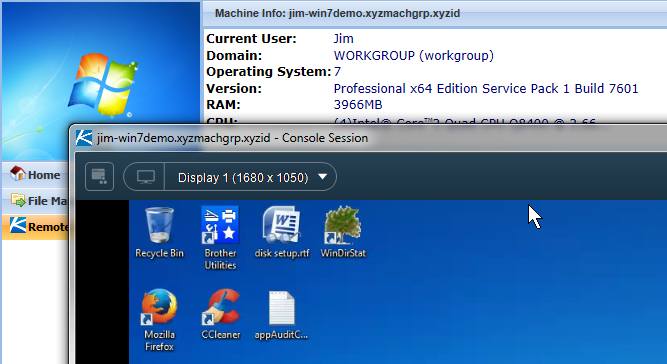
The user will then see the full Live Connect page.
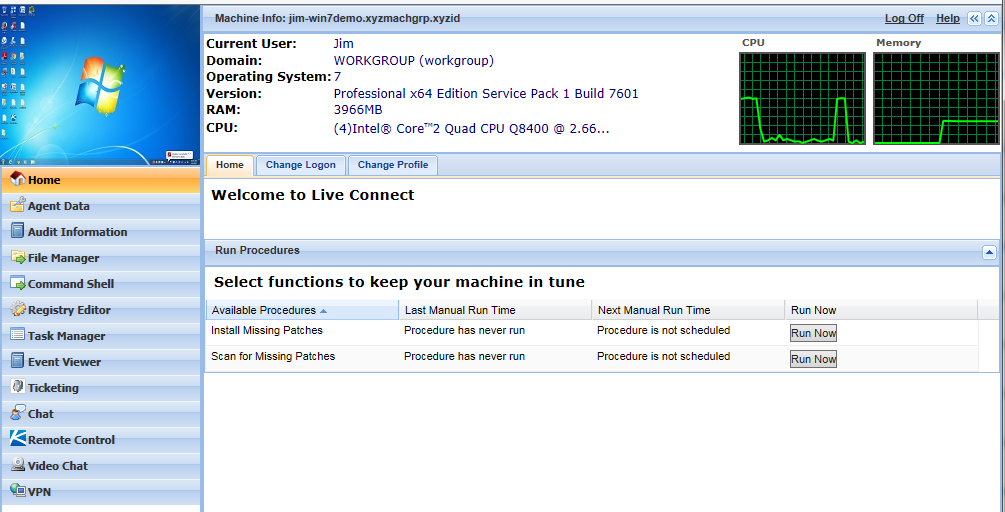
Click the Remote Control Tab to start a remote session. A new window will be launched for this.
Note on Full Live Connect Page
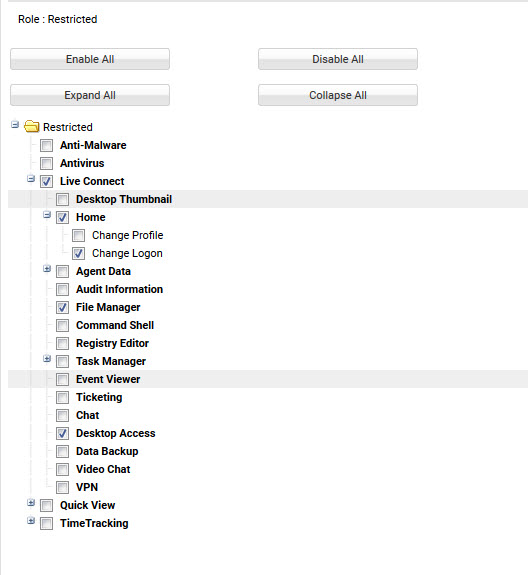
We can limit the tabs shown on the users Live Connect screen. To so this we need to create a custom Machine Role and assign the agent to it.
Creating a Custom Machine Role (added 6/2/17, thanks for the question Alan!)
For partners on SaaS or their on own-prem servers, you would go to the System Tab-> User Security-> Machine Roles. Click “+New” to create a new role (i.e. Chris-test), and select “Basic Computer” and save. (For partners on our Hosted Kaseya platform, just open a ticket with us)

Next select that role, and go to the “Access Rights” tab, and click “Set Role Access Rights”. Here you can pick and choose what you want your end-user to see. For Remote control only, you will probably want to disable everything except for Live Connect (Home (change login), File Manager, and Desktop Access)
Once you have the policy set, it is a little tricky… To assign the policy, you actually have to go back to the Default policy and under the “Members” tab, locate the machine(s) you want to change, and then click “+Change Machine Role” at the top, and select the new profile (i.e. Chris-test).
If you would a Custom Machine Role please open a ticket with support by emailing help@virtualadministrator.com
A Custom Machine Role Live Connect screen might look like this:

Be sure to provide clear instructions to your client to make sure they are able to get this setup and connect. Let us know if you have anything you want to add to the blog!